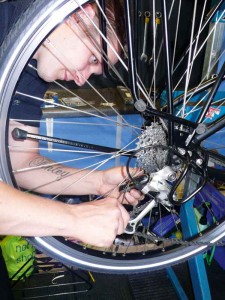
How to: replace a bike chain
Bike, Bike equipment, Gear, Technical — By Outdoor Adventure Guide on March 16, 2012 at 3:40 pmHaving a few key skills and the right multi-tool could save your bike tour from a premature end, so we spoke to Adrian at Terry White’s bike shop to show us how to get it done.
“Repairing your bike on the trail is made easier with the right tools to hand,” says Adrian. “Here I’m going to explain the tools and technique you need to replace a broken chain, and how to adjust the gears so the chain doesn’t jump around on the sprockets. I’ll use a special chain-fixing multi tool and bike stand – though you’d ideally have a friend to hold the bike upright.”
1.Invest in a good multi-tool with chain fixing tool. Adrian uses a Top Peak Hexus II (£19.99) or a Park Tool IB-3 (£24.99)
2. The old chain was weakened, so we fitted a new Shimano Ultegra XT (£32.99). Ensure the connecting pin is in the pack. Carry a Missing Link just in case.
3. Check the rear derailleur for cracks and straightness. Check that the jockey wheels on the rear mechanism are tight using the allen key tool.
4. Set gears to small cog, both at front and rear mechanisms. The rear derailleur is tensioned and if it jumps off the large cog it can cause injury!
5. Drop the chain off the front cog to join together using the connecting pin. Insert the pin through the two ends of chain – longest bit first.
6. Pull ends of chain to tension tight enough so the back derailleurs don’t catch.
7. The pin is grooved and the surplus pin is designed to break off.
8. Ensure chain and all the links move freely.
9. Keep spare links in your tool kit – you may need them if it breaks again!
More like this


 Tweet This
 Share on Facebook
 Digg This
 Bookmark
 Stumble


[...] How to change a bike chain [...]
[...] How to change a bike chain [...]